Note: The Dealership/service department charges several hundred dollars to change the plugs, so doing the procedure is worth it. But only if you are sure you are up to it. Good luck.

The Hyundai Santa Fe Replace 6 cyl spark plugs
| Original idea: | billbrase |
| Author of procedures: | Hennesseystealth |
| Installer / Testers: | numerous |
| Images provided by: | Hennesseystealth, twospirits |
Introduction / History
| Replacing the spark plugs on a
Hyundai Santa Fe is quite intensive and most owners choose to let the
dealership perform the procedure. But there are a few that would want to do
it themselves. This guide is for them. Note: The Dealership/service department charges several hundred dollars to change the plugs, so doing the procedure is worth it. But only if you are sure you are up to it. Good luck. |
|
This is for the 2.7L V6 engine. While it is possible that the procedure can be performed on the 2.4/3.5 liter versions, this write-up only outlines the 2.7L procedures. Change interval is 50-60K on platinum plugs and 10-30k for copper ones. More info on the original topic (if still available) here on the Santa Fe Forum as well as on the original members (Hennesseystealth) website. |
Disclaimer
|
Difficulty level / scale: On a scale of 1 - 10
| Easy | Difficult |
| 1 | 2 | 3 | 4 | 5 | 6 | 7 | 8 | 9 | 10 |
| X |
Time to perform procedure:
| The procedure should take about 45 minutes max, once you have studied the steps and your engine bay as well as comfortable with working on the engine. Longer (about an hour) the first time due to the nasty center tie down bolt (explained later). Once you are familiar with the procedure the next time should not take you longer than 30 minutes.. |
Tools and materials needed:
| 10 & 12mm socket |
| Ratchet wrench with long and short extensions |
| spark plug socket |
| pliers |
| Philips screwdriver |
| flat screwdriver |
| adjustable wrench |
| Metal crush gasket |
| New surge tank gasket (part number: 29215) |
| 6 platinum tipped spark plugs (manual says Champion RC12PYP or NGK PFR5N-11 plugs) Some swear by the NGK ones though. |
|
NGK PFR5N-11 |
Champion RC12PYP | |||
|
|
 |
|
| Optional: |
| 1 autolite |
Step 1 - Precautious measures (optional).
(Click on images to open up in
full size)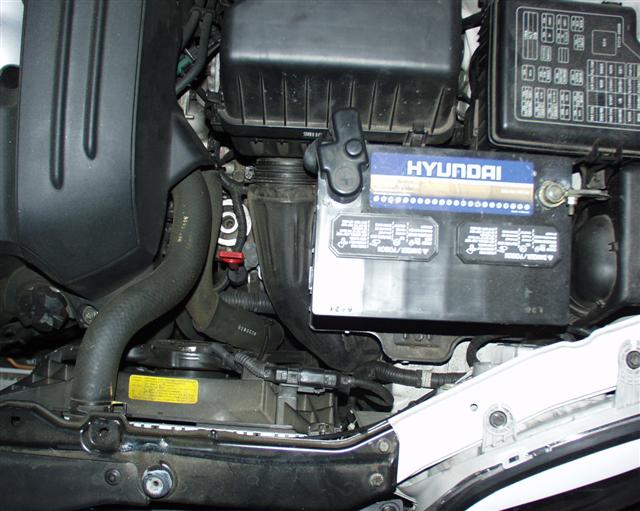 |
01- | Disconnect negative wire on
battery. (This is optional, but it is preferred for safety.) |
(Click on images to open up in
full size)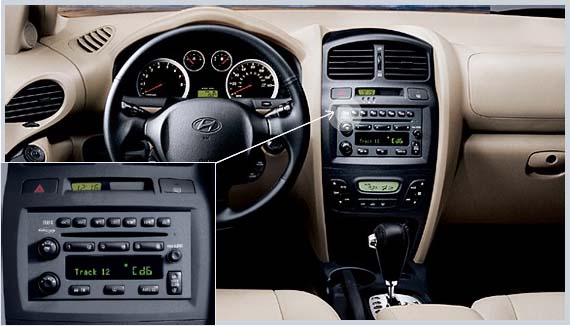 |
02- | If you do disconnect the battery, make sure you write down your radio settings, since they will be erased once the battery gets disconnected. |
(Click on images to open up in
full size)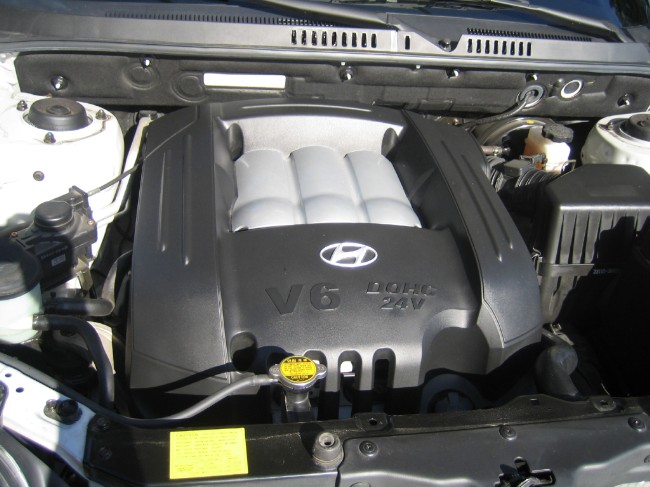 |
03- | Start with the engine in a cold condition. |
Step 2 - Remove engine cover.
(Click on images to open up in
full size)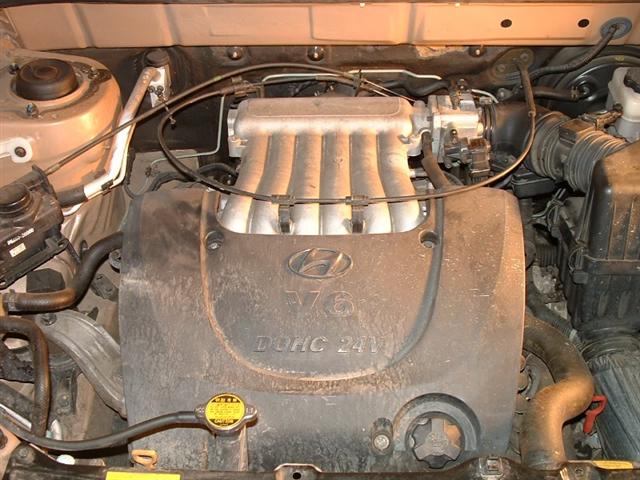 |
04- | Remove plastic engine cover from the engine block. (By removing the four bolts.) |
(Click on images to open up in
full size)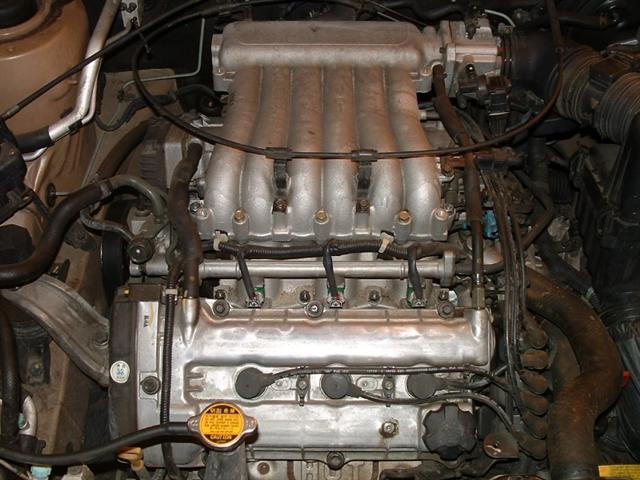 |
05- | You can remove the front plugs at this time. If the plug wires are stuck, rotate them clockwise and counter-clockwise until they are loose. Use dielectric grease on the bolts when you replace them. Anti-seize on the plug threads is also recommended. However, be careful not to get it on the electrodes. |
Step 3 -Disassembling the engine cables.
(Click on images to open up in
full size)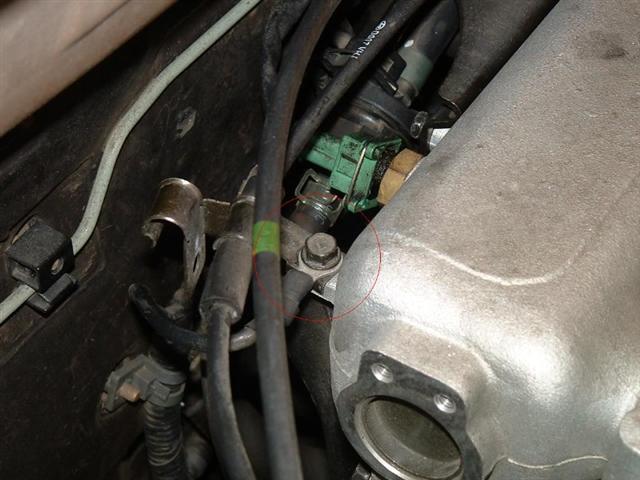 |
06- | Remove back left throttle cable/ground strap small bracket bolt. |
(Click on images to open up in
full size)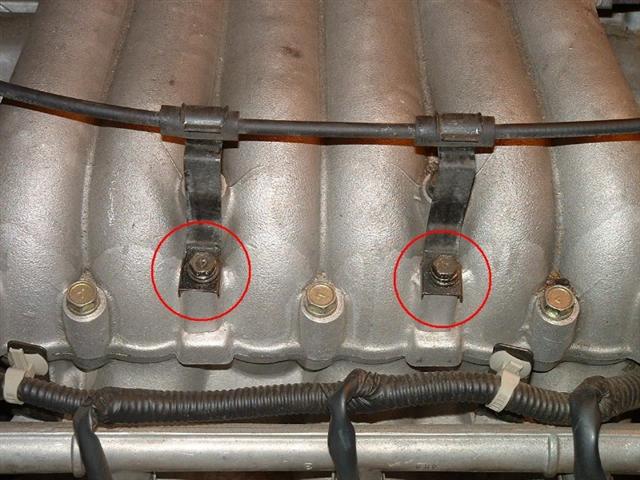 |
07- | Remove front two throttle cable bracket bolts. |
(Click on images to open up in
full size)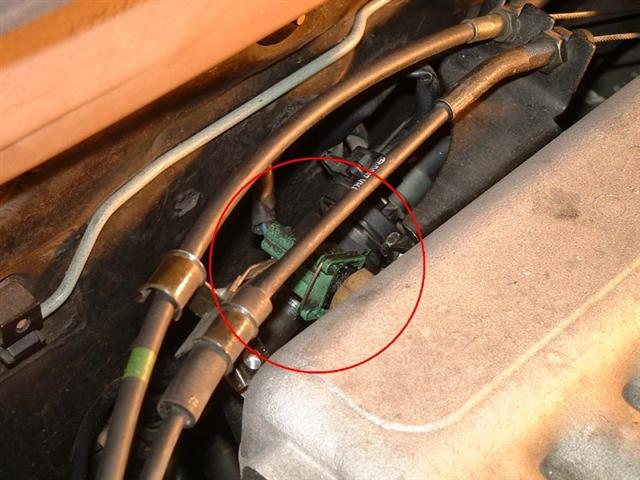 |
08- | Remove electrical connector left of rear throttle cable main bracket. |
(Click on images to open up in
full size)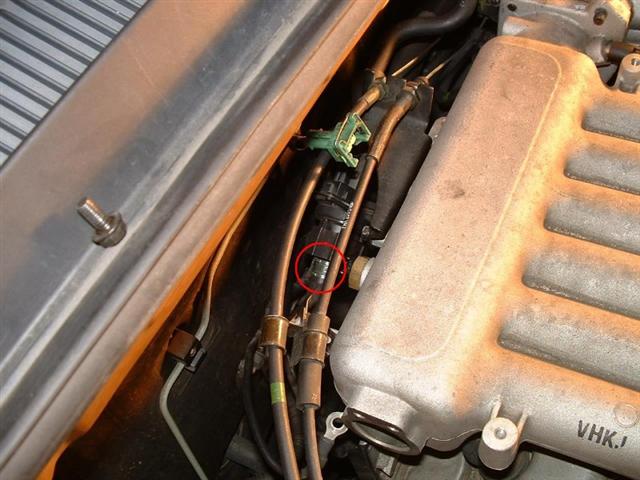 |
09- | Remove vacuum hose from left side of vacuum solenoid (don't know what that unit does but it is right below the main throttle cable bracket). |
(Click on images to open up in
full size)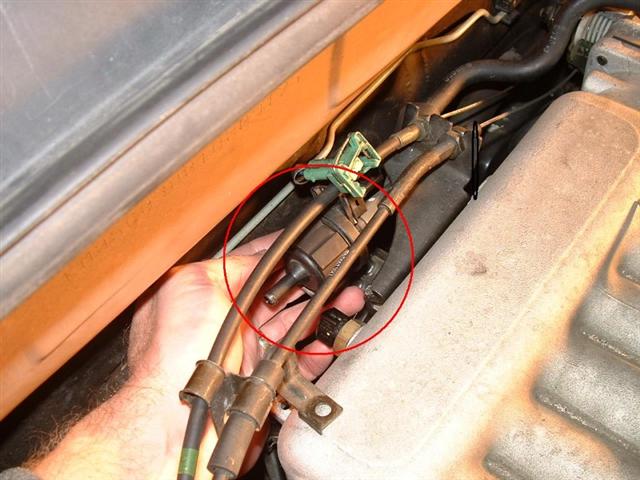 |
10- | Slip vacuum solenoid off of bracket by pushing it towards the driver's side. |
(Click on images to open up in
full size)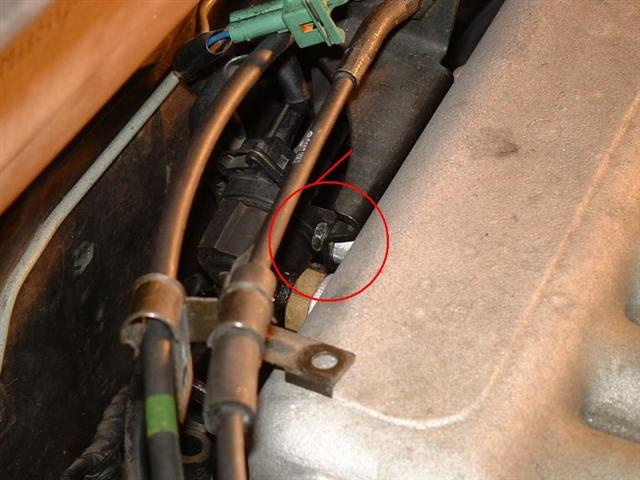 |
11- | Remove two bolts holding the main throttle cable bracket (note: these bolts also hold a second bracket the holds the vacuum solenoid). |
(Click on images to open up in
full size)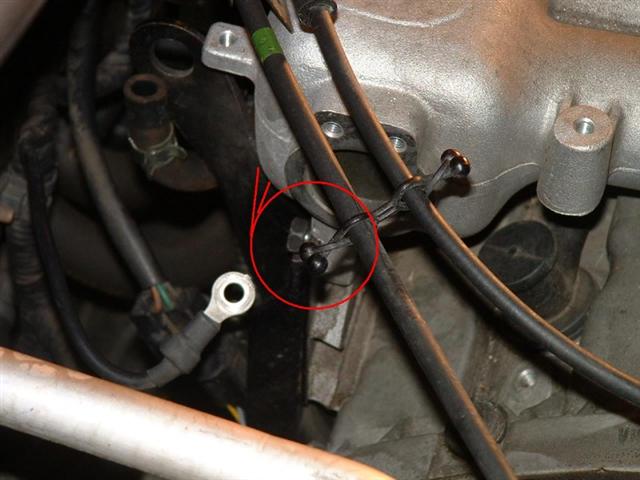 |
12- | Remove the three rear plenum tie down bolts. The left one you can see from the left side, the right one is right below the throttle cables about an inch from the right edge of the plenum, and the center one is under the main throttle cable bracket. DO NOT REINSTALL THE CENTER BOLT WHEN REVERSING THE PROCESS. Without the center tie down bolt you MAY be able to skip steps 3-8. I didn't check so this is still unknown. |
(Click on images to open up in
full size)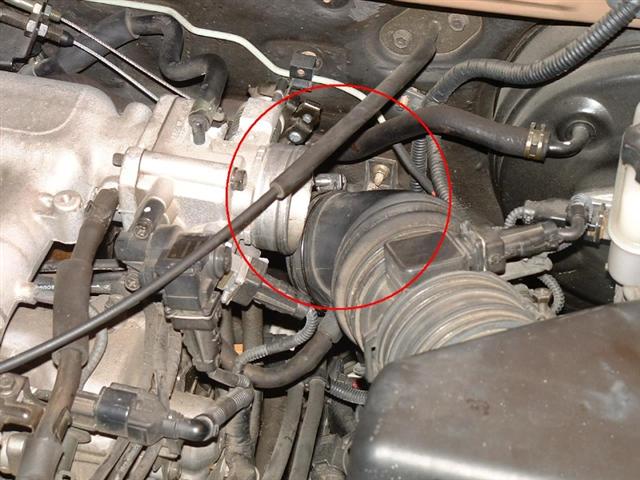 |
13- | Unclamp the black rubber intake hose from the throttle body and push it under the throttle body. |
(Click on images to open up in
full size)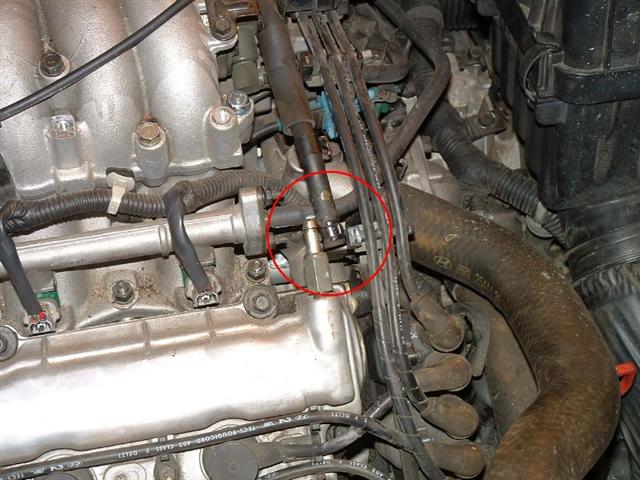 |
14- | Remove the hose from the the PCV valve at the top right of the front valve cover. |
(Click on images to open up in
full size)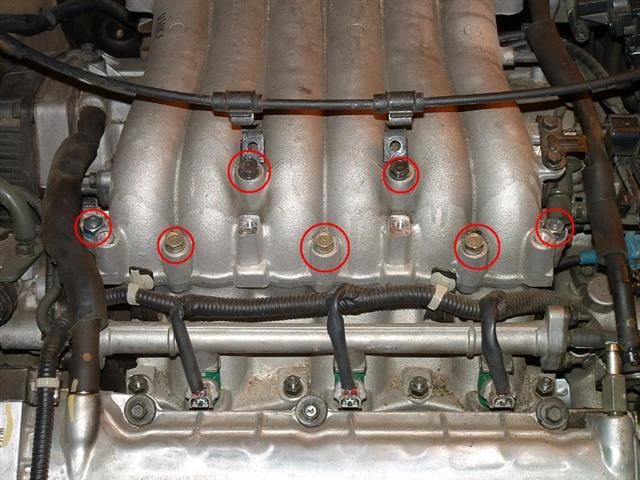 |
15- | Remove nuts and bolts holding the front of plenum (2 nuts, 2 long bolts, 3 short bolts). |
(Click on images to open up in
full size)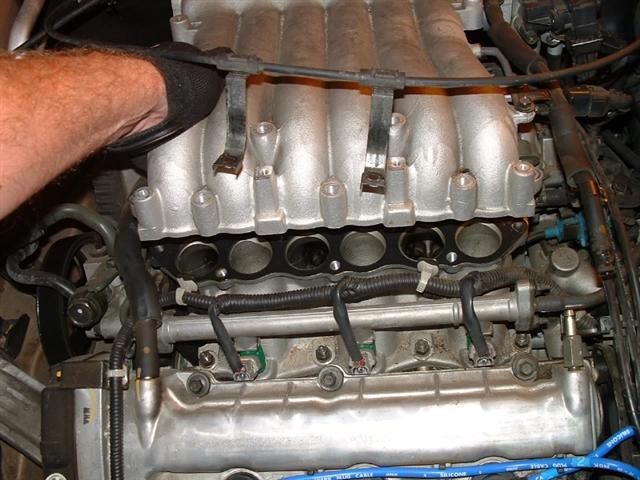 |
16- | Lift plenum off studs. |
(Click on images to open up in
full size)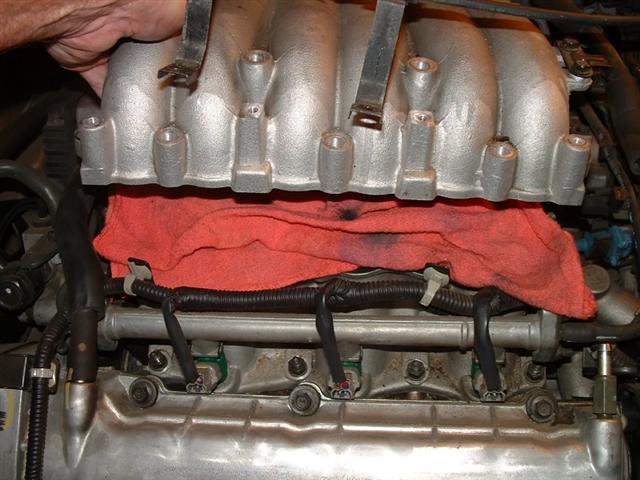 |
17- | Place a rag over the intake manifold so you don't drop anything into your engine. |
(Click on images to open up in
full size)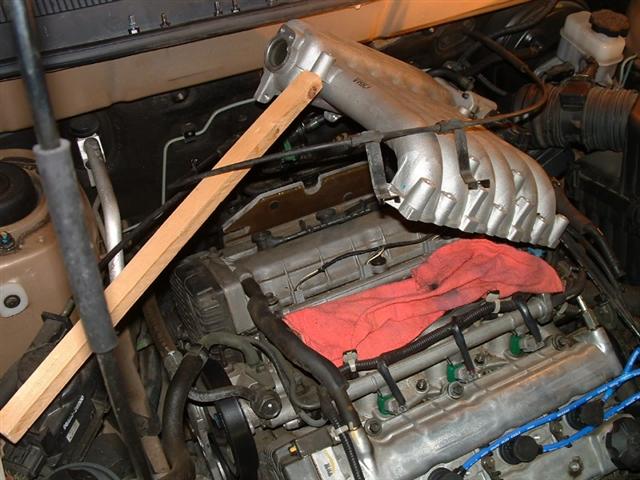 |
18- | Tilt the plenum up on the passenger side about 45 degrees and brace up with a 6-8" long piece of wood or equivalent. |
| 19- | Change rear plugs. | |
| 20- | Replace everything. |
Additional information:
|
|
Great site that gives you step by step instructions on
changing plugs and what plugs to use for what applications. Go to the garage area and look up Spark Plugs under Factory Items to see how we change the rear plugs. You can also review some good spark plug discussions under the Tips & Tech on the same page. |
This site was last updated 03/20/07
