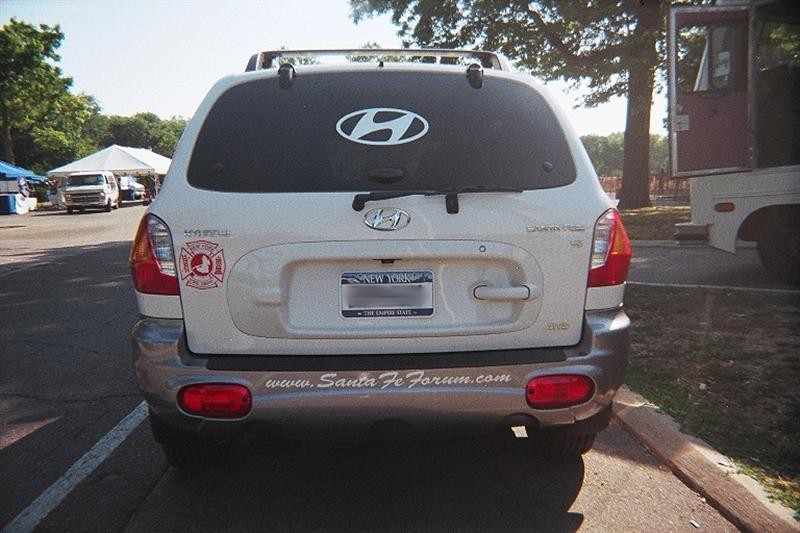
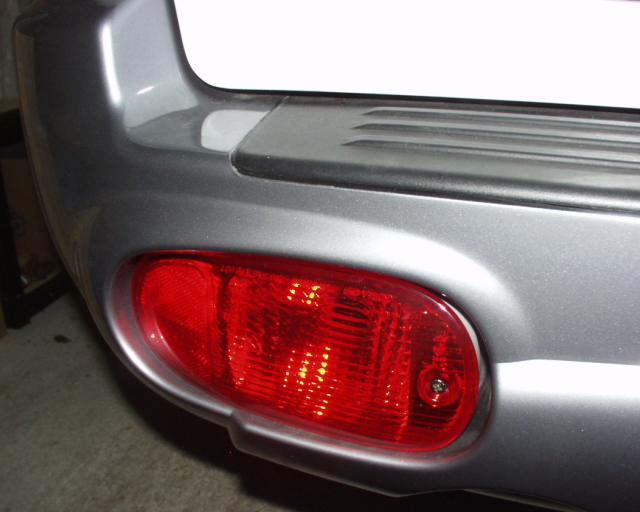
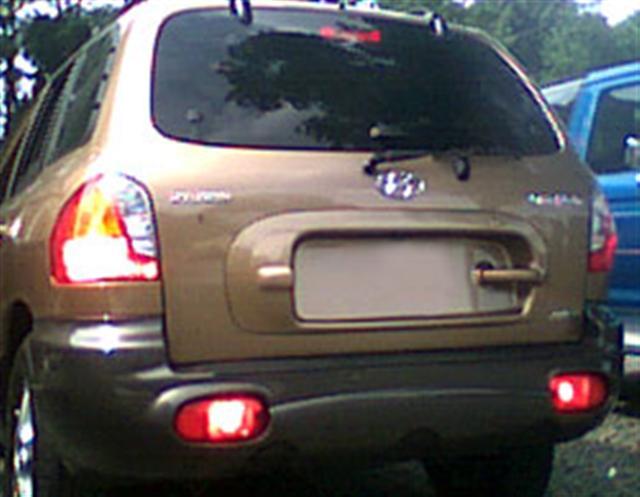
The rear bumper of the Hyundai Santa Fe
contains 2 fog lights lenses housings.
In countries outside the U.S.
these rear fog light lenses are operational and are used during
periods of limited visibility. The Santa Fes' sold in the
US do not have the these lenses wired up. The US Version Santa Fe
comes equipped with these D.O.T. approved rear fog light lenses
with the only difference that they are simply not
equipped with the wiring harness and the sockets
within the housing are plugged
up. They are NOT fake tail lights or simply
reflectors as many people seem to think. making these
lenses operational allows your vehicle to be seen by others behind you thus
increasing your margin of safety in not so fair weather. For purposes of simplicity,
this modification will address this issue by adding the function of rear
brake lights on to these lenses in Section A. Eventually this mod will have
an added section that would allow the modifier to make these lenses into
actual rear fog lights as intended and used by our European/Asian
counterparts.
2 x Conduct~Tite #85881 for 89-96
GM vehicles harness
Test light
2 x
3157 or 2 x 1157 bulbs (or LED for
brighter less power)
Portable vacuum cleaner
Philips (cross tip)
screwdriver
Sanding File or Dremel
tool
Wire cutters / stripper
/crimpers (cutter and pliers are fine)
Hammer
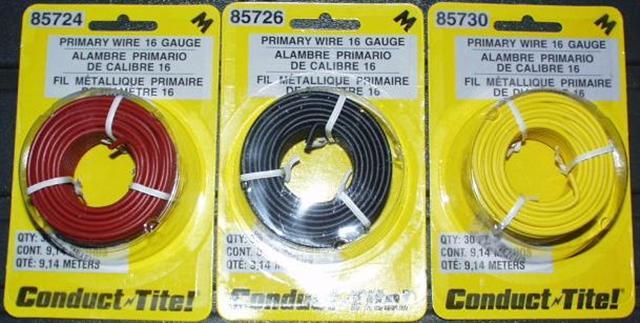
3 x 6 feet of 14/16/18 gauge wire (1-back, 1-yellow, 1-red)
piece of wire
hanger about 3' long (to fish
the wires)
9 blue wire tap connectors (from Radio Shack)
Electrical tape
Note: The
Conduct~Tite #85881 socket harnesses are also known and
sold under the name of Motormite with the same part number. Either can be
obtained at your local Autozone store or on their website by looking up a
1999 Monte Carlo.
Make sure you have all the necessary parts
handy because you will be having the rear hatch open for some time while
working on the rear light portion of the install and keeping the hatch open
this might drain the battery because the interior lights will go on. its
best if you turn off the rear hatch light.
Time to install item:
Total time for mod:
60-90
min
Section
A - Converting Rear Fog Light Housings into Functional Brake Lights
Step 1:Preparation (Acquiring
the parts)
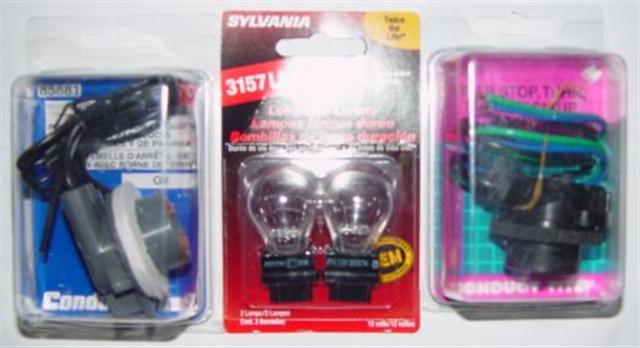
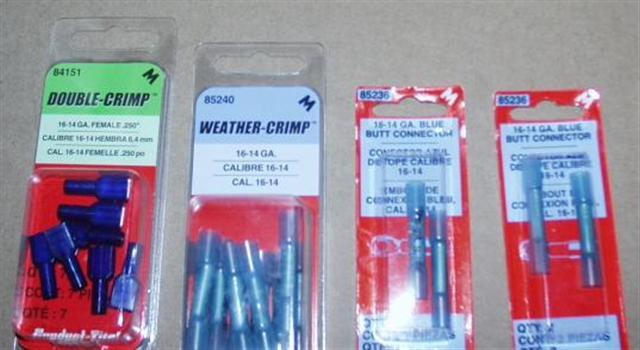
Pic 1- by Retired in Bama
Make sure you have the
correct sockets and bulbs. For the modification we used Conduit-Tite /
Motormite packaging and 3157 bulbs. These sockets can be obtain from the
Autozone website. The procedure on how to acquire them is listed below under
the section titled "Autozone Purchase".
(SEE PIC # 01.)
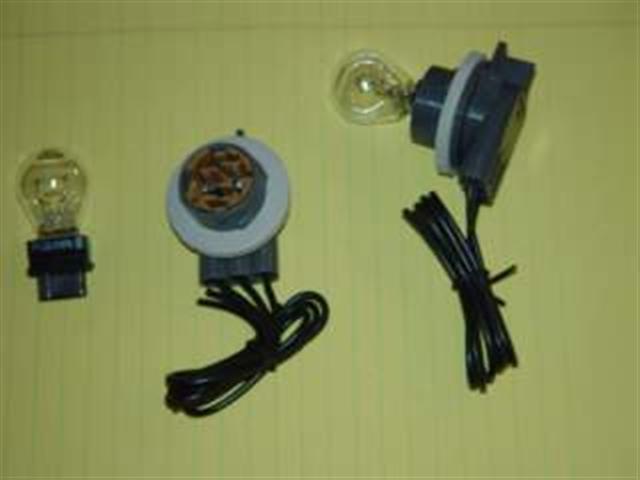
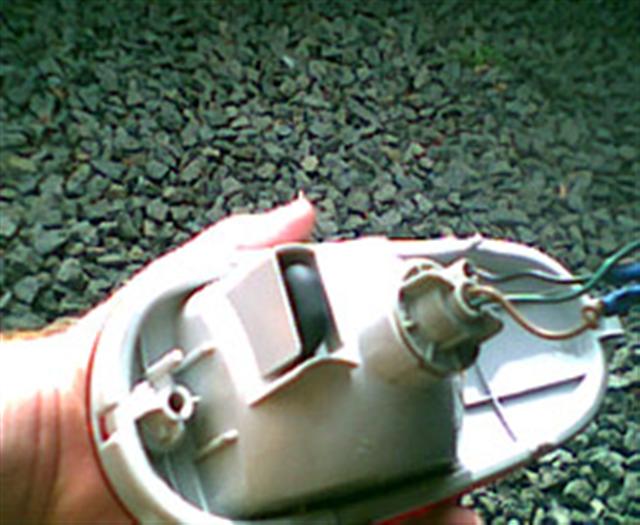
Pic 2- by Retired in Bama
Sockets out of the
packaging.
(SEE PIC # 02.)
Pic 3- by twospirits
The three wires for the
modification.
(SEE PIC # 03.)
Pic 4- by twospirits
The connectors. (SEE PIC # 04.)
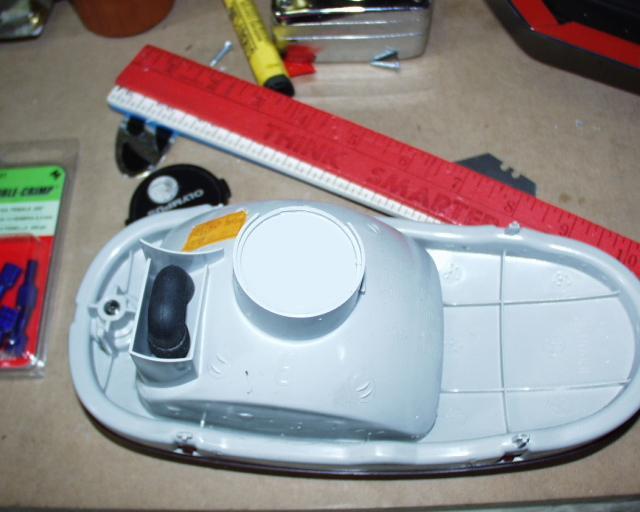
Step 2:Preparation
Pic 5- by twospirits
Remove the left rear fog
light housing by removing the screw from the housing and pulling the housing
out from the bumper. Pull towards you, the side with the screw first,
because the other side has a plastic connecting hook that can easily be
broken if forced out. Do the same to the right side also. (SEE PIC # 05.)
Pic 6- by twospirits
Place the rear fog light
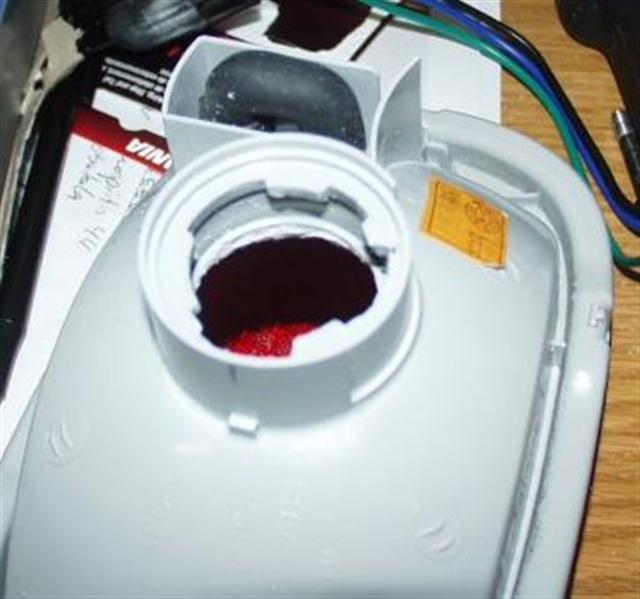
housing to a work area, you will notice the plugged up socket. This plug
cannot be just tapped out. I used a Dremel tool to drill out the plug,
others have used a large plastic mallet by tapping it in and cutting it in
half with cutting pliers and others have used a 1 inch drill saw. Either
method will get the plug out. (SEE PIC # 06.)
Note: With the
Conduct~Tite / Motormite #85881sockets
you will notice that it has a rubber gasket. (see pic 02) This gasket keeps
the sockets snugly in the housing, but for those that want to have them
inserted and twist lock to really stay on you can do the following three
instructions. Otherwise proceed to step 3.
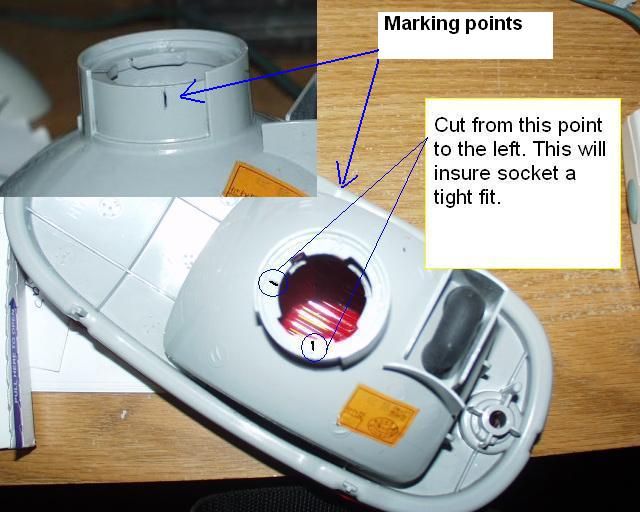
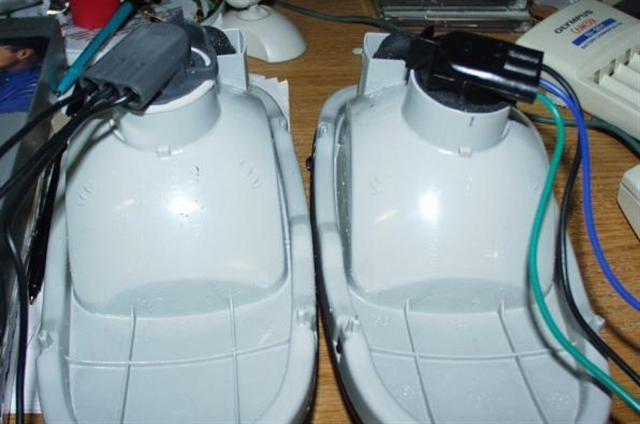
Pic 7- by twospirits
You can at this point
perform some further drilling/sanding to make the sockets insert (and turn)
snugly inside the housing.
Place the socket inside the housing and mark the points where the ears of
the socket are obstructing full entry. Take the sockets out and this
is where you will cut to enlarge the opposing cut-outs in the housing with a
dremel tool. (SEE PIC # 07.)
Pic 8- by twospirits
This what it should look
like after doing the cutouts. This will insure the sockets to inserted
and turn to lock. (SEE PIC # 08.)
Pic 9- by twospirits
Insert the socket into the
housing to test that they insert, twist and lock. (SEE PIC # 09.)
Take out the sockets and you may need to use an air blower or your finger to
fish out any shavings left inside after the plug is out.
Step 3:
Removing and preparing the rear tail lights.
Pic 10- by
kcorcoran
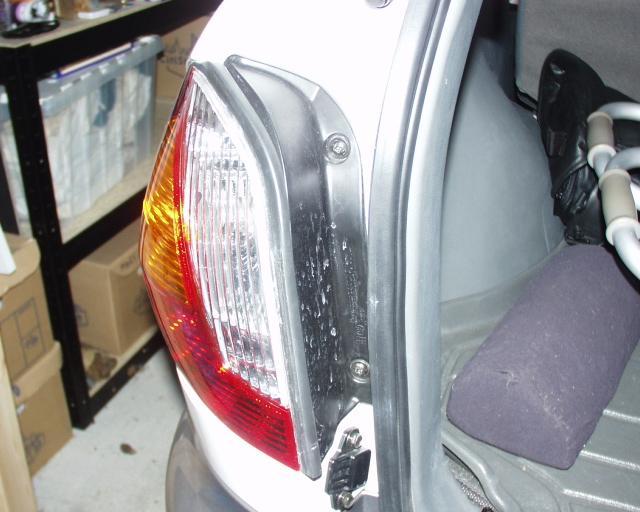
Open the rear hatch and
remove the 2 screws holding the tail light and remove it by pulling it out
to the side of the vehicle (not towards the back). There is a peg that holds
it on the side of the vehicle, if you find yourself pulling to hard to get
it out, you are doing it wrong. Stand to the side of the vehicle, facing it
and pull the tail light towards your.
(SEE PIC # 10.)
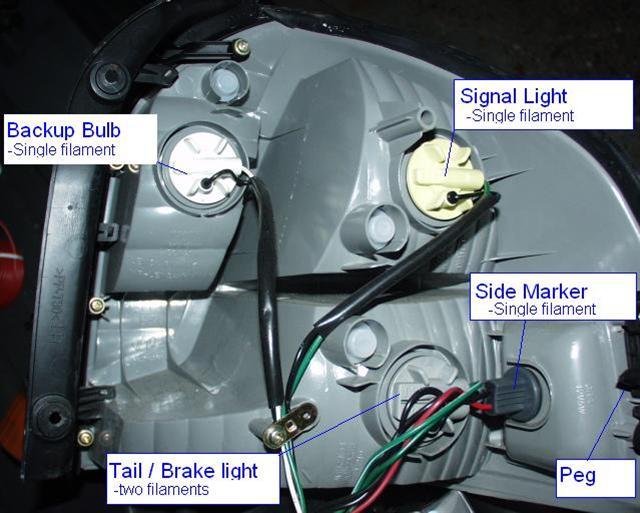
Pic 11- by twospirits
Once the tail light is
out, become familiar with it.
Inside the stock OEM tail light housing are 4 bulbs/sockets.
1. (Gray socket) Tail / brake light bulb with two filaments. (3 wires)
2. (White socket) Backup bulb with single filament. (2 wires)
3. (Yellow Socket) Signal light with single filament bulb. (2 wires)
4. (Black socket) Side marker, a small bulb with a single filament. (2
wires) (SEE PIC # 11.)
The Euro lights have the same lights
except # 4 (the side marker socket).
Step 4:
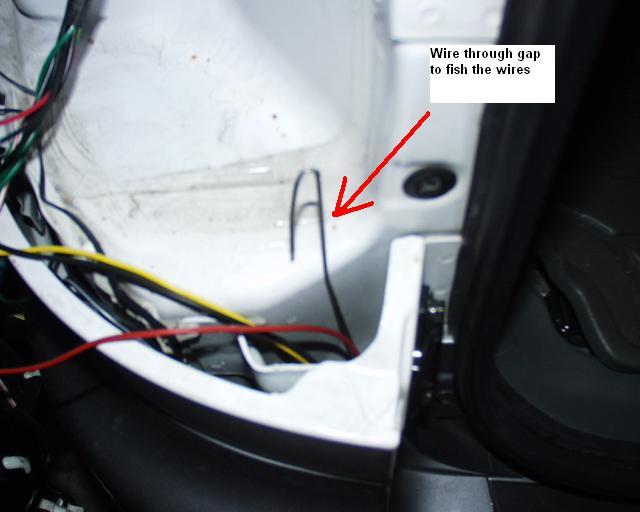
Routing the wires
Pic 12- by
kcorcoran
With the tail light out of
its holding well, you can see a hole/opening between the bumper and the
vehicles' frame. (SEE PIC # 12.)
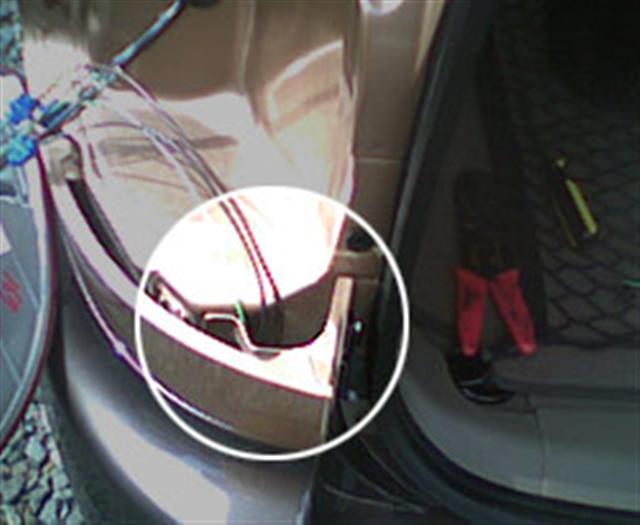
Pic 13- by twospirits
In the rear fog light
holding well you will also see a hole opening. (SEE PIC # 13.)
Pic 14- by twospirits
Take a wire hanger and
open it up to form a long fishing rod. insert the rod in the opening shown
in pic 13 above and run it through until it comes out the opening shown in
pic12 above. (SEE PIC # 14.)
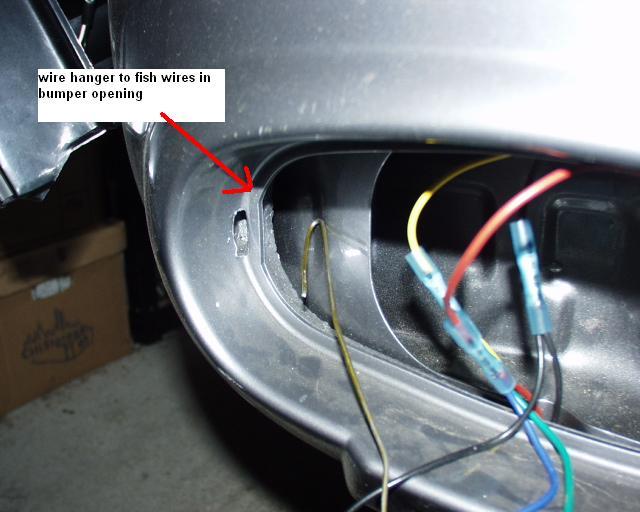
Pic 15- by twospirits
Take about 2.5 feet of
each color wire (1-back, 1-yellow, 1-red) and using electrical tape wrap it
at the end of the wire hanger. Then gently and slowly fish the wires through
the openings so they come out the fog light holding well. (SEE PIC # 15.)
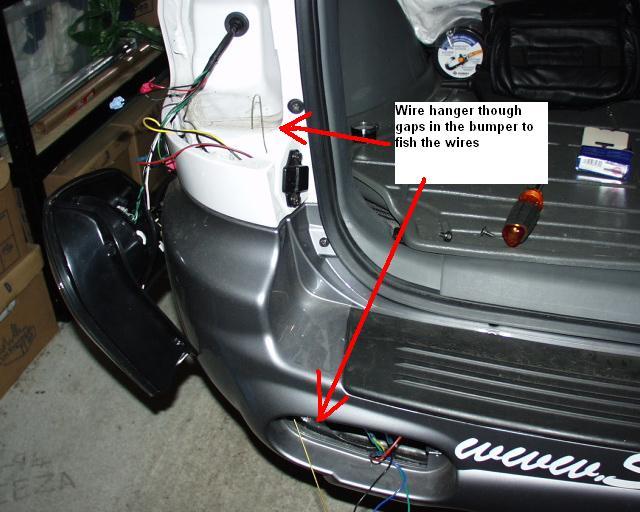
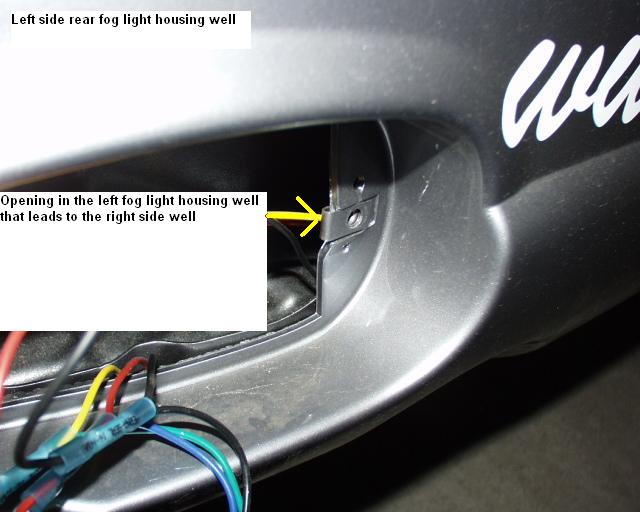
Pic 16- by twospirits
In the left side rear fog
light housing well you will see another opening that leads into a hollow
chamber that leads to the other side. (The right side well) take the wire
hanger and insert it though. (SEE PIC #16.)
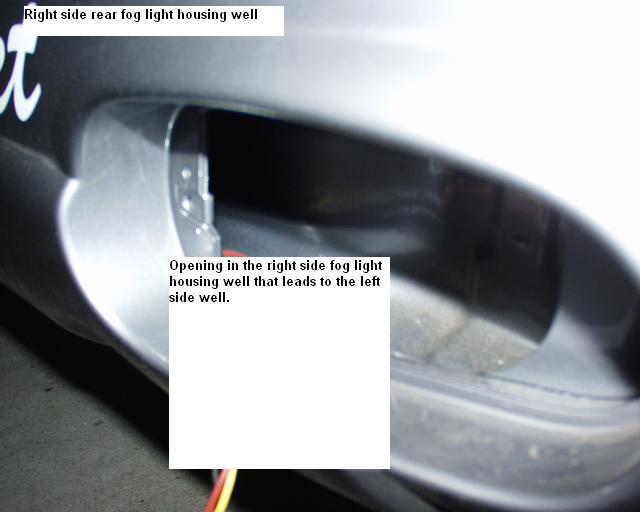
Pic 17- by twospirits
Opening on the right side
where the wire hanger comes out of. (SEE PIC #17.)
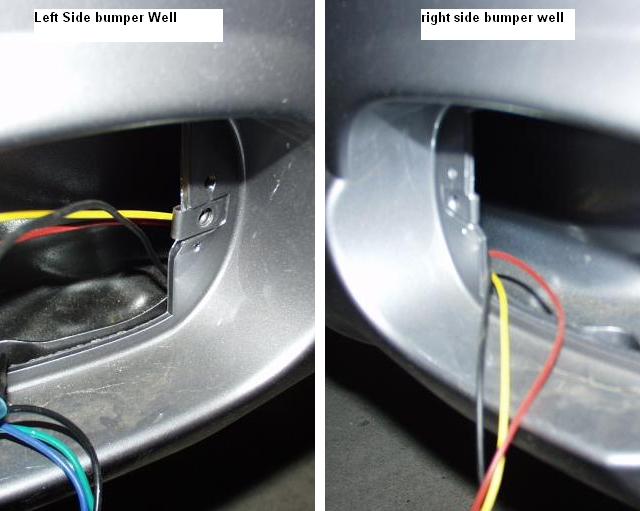
Pic 18- by twospirits
Take about 3.5 feet of
each color wire (1-back, 1-yellow, 1-red) and using electrical tape wrap it
at the end of the wire hanger. Then gently and slowly fish the wires through
the openings. (SEE PIC #18.)
Step 5:
Wiring the wires to the tail light
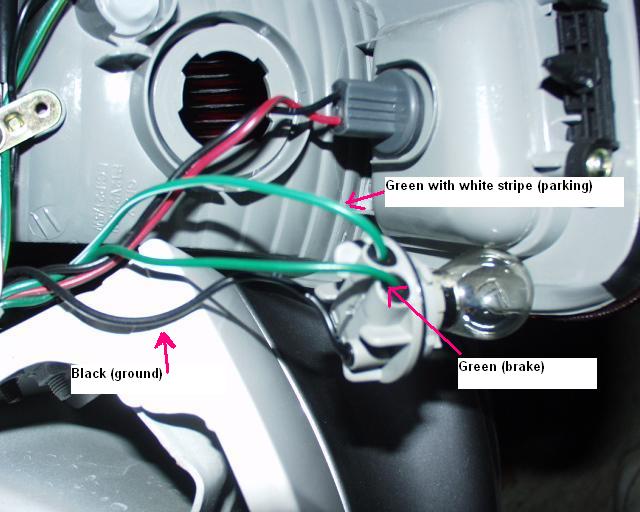
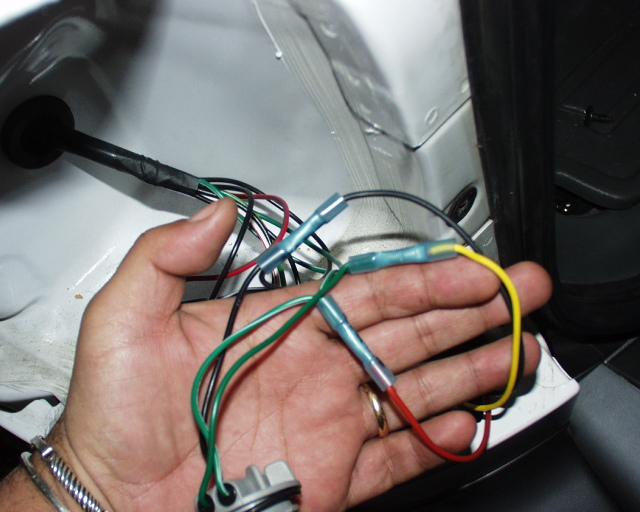
Pic 19- by twospirits
We are now going to wire the three new wires to the tail light. You will
only be concerned with the Brake lamp. The Brake lamp socket is colored gray
and consists of three wires. (The others have only two wires). The color of
the three wires of the brake lamp are..
Black (Ground)
Green (Brake)
Green with White stripe (Parking) (SEE PIC #19.)
Pic 20- by twospirits
You will now connect the wires using a blue butt connector (or if you prefer
you can solder the connections or use male/female Y connectors).
Connect the wires in the following color procedure.
Tail
Light Socket
New
Wires
Green wire
Green/White Stripe wire
Black Wire
Yellow
Red
Black
(SEE PIC #20.)
Step 6:
Wiring the wires to the rear fog light harness
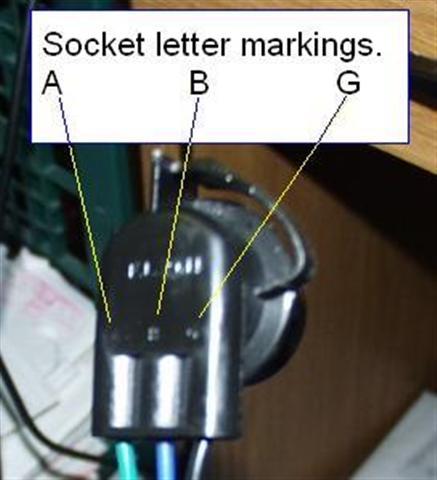
Pic 21- by twospirits
The Conduct~Tite
/ Motormite sockets have three wires that are color coded as follows.. Fog Light Socket
Green (Brake) - marked with the letter A
Blue (Parking) - marked with the letter B
Black (Ground) - marked with the letter G
(SEE PIC #21.)
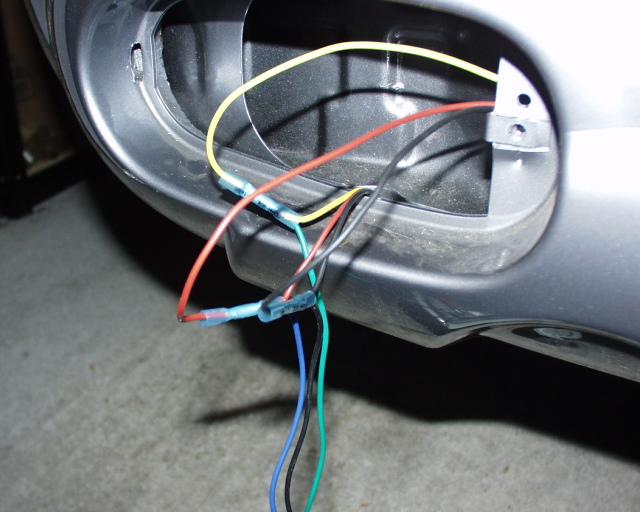
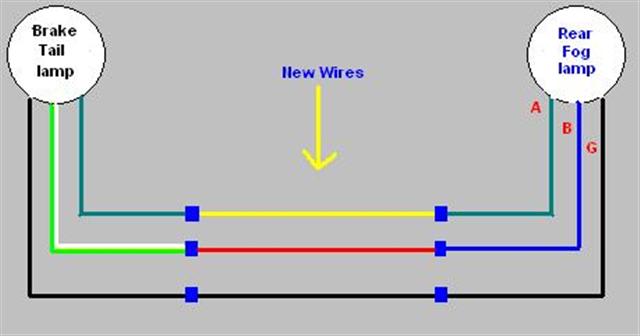
Pic 22- by twospirits
You
will now connect the fog light wires using blue butt connector with the
wires coming from the tail lamp. (you will be connecting both set of new
wires to the fog light harness)
Connect the wires in the following color procedure. You can refer to the
diagram below.
Brake
Tail Light Socket
New
Wires
Fog
Light Socket (Motormite)
Green wire
Yellow
(A) Green Wire
Green/White Stripe wire
Red
(B) Blue Wire
Black Wire
Black
(G) Black Wire
(SEE PIC #22.)
Step 7:
Connecting the parts together.
Pic 23- by
kcorcoran
Put the
lights (1157 dual filament bulb) back into the light socket.
Place the newly updated fog light housing socket into the fog light housing.
Place the fog light housing into the bumper, (no need to screw it back in
since you will be testing it in a minute or so).
Reinstall the Rear lights (stock or Euro).
(SEE PIC #23.)
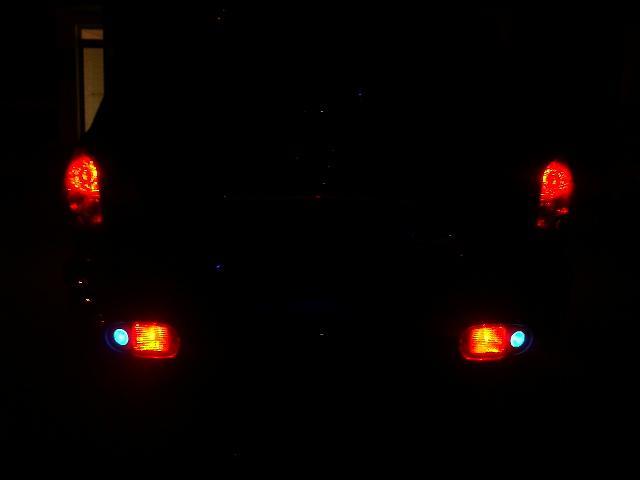
Step 8:Testing the lights
Pic 24- by
twospirits
At this point
you should test the lights before actually screwing the Rear lights and Fog
lights back into their housings. make sure that the lights do exactly as
this mod intended. When you have the headlights on, the rear fog lights
should also come on. When Braking, the rear fog lights should be brighter.
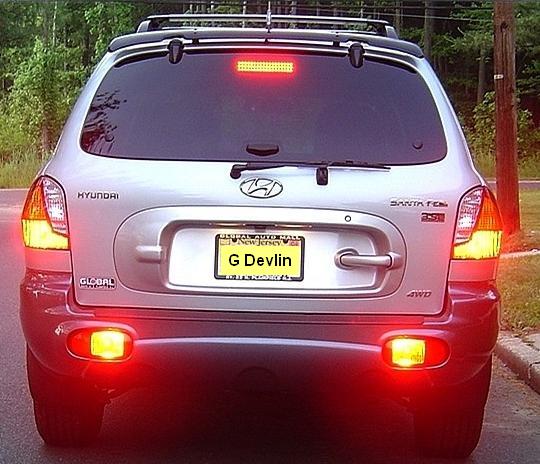
(SEE PIC #24.)
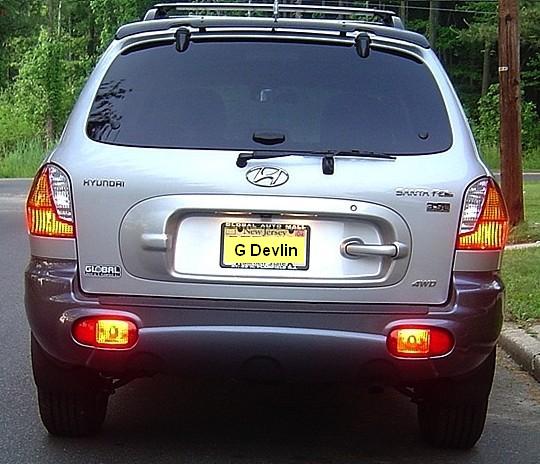
See below for better pics (provided by
fellow Santa Fe Forum member G Devlin
Step 9:Reinstall the Fog Light
housings
Pic 25- by
kcorcoran
At this point
you should screw all the light housings into their specified areas. The
wires if you kept them at a reasonable length can be placed in the channel
at the back of the tail light housings and fog lights. There they will not
kink or cause any problems or be exposed to the elements and will make your
tail light fit back in place without any problem.
Stand back and admire your new rear fog lights.
(SEE PIC #25.)
Appendix:
Acquiring the sockets (Autozone Purchase):
Pic 26- by Retired in Bama
The procedure on how to
acquire the Conduit-Tite / Motormite # 85881 sockets used in this
modification is as follows...
Just click this link
http://www.Autozone.com
Select vehicle year: 1999
Select make: Chevrolet
Select Model: Monte Carlo
Select whatever engine
Click continue
On left of page click Shopping
Then click parts by Category: Electrical
Then click on: Bulb- Exterior socket
Then Click on: Brake Light
Results should show Motormite 85881 for around $6.99, you would need two.
Additional views of the Rear Fog Light Modification
Pic 27- by G Devlin
Shows
the lights in the daytime without the rear brakes being applied