Unlike the easy and quick version, this detailed guide shows how to extend the armrest while making it look OEM and professional.
The Hyundai Santa
Fe Armrest Modification
Detailed and Professional look version
| Original idea: | Ted |
| Author of procedures: | Ted |
| Enhancements: | Ted |
| Installer / Testers: | Ted |
| Parts Supplier: | Any Home improvement store, hardware store. |
| Images provided by: | Ted |
Introduction / History
| The armrest assembly within the center console of the Santa Fe is
quite lower than most others I've been in. It is set at
that height so the driver can have a unobtrusive reach for the Shiftronic.
There are some that would rather have this assembly much higher. This
modification addresses that need by elevating the rest area for their arms,
both driver and passenger. Unlike the easy and quick version, this detailed guide shows how to extend the armrest while making it look OEM and professional. |
|
Disclaimer
|
Difficulty level / scale: On a scale of 1 - 10
| Easy | Difficult |
| 1 | 2 | 3 | 4 | 5 | 6 | 7 | 8 | 9 | 10 |
| X |
Tools and materials needed:
| Philips screwdriver |
| 8 mm socket wrench |
| Drill |
| 12 5/16 washers |
| #8 (Long) counter sunk screws |
| speed clips |
| gutter screen / wire mesh |
| metal shears (to cut the gutter screen / mesh) |
| Styrofoam packing material |
| Hot glue and glue gun |
| Short hair fiberglass and hardener |
| Masking tape |
| Bondo (no glass type) |
| 80 grit sand paper |
| 200 grit sand paper |
| 600 grit wet/dry sand paper |
| Liquid Metal |
| Sandable primer (with sprayer) |
| Optional: |
| Clear acrylic |
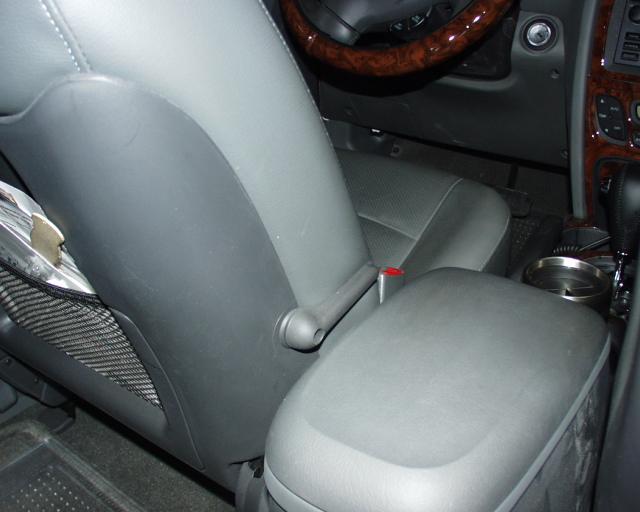
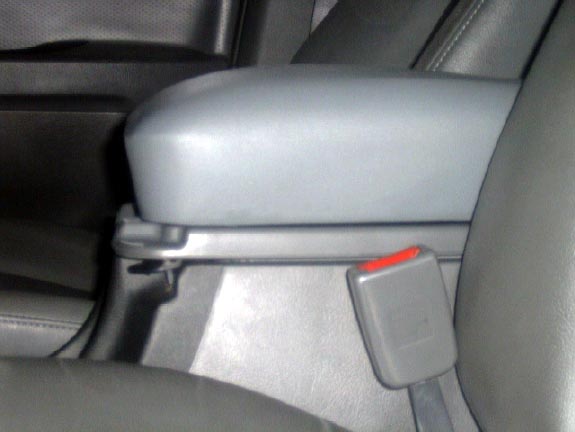
Step 1: Removing the console.
 |
Locate the the rear ash
tray and cup holder. |
|
|
|
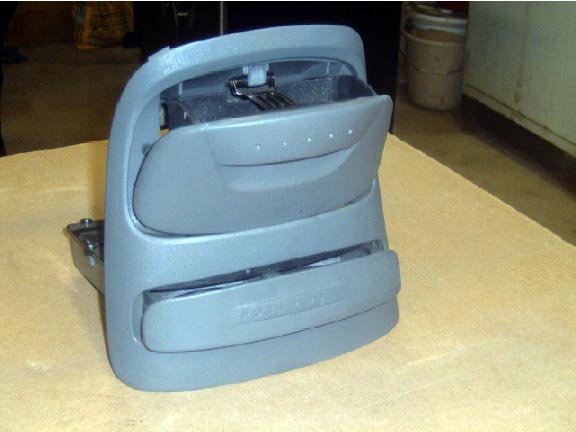 |
Pull out the entire Bezel-Floor console assembly away from the Console starting at the bottom. Put the Bezel aside. |
|
|
|
 |
Remove the armrest assembly from the console, by opening both lids and removing the two 8mm nuts from above where the ash tray was. The entire top armrest
assembly comes right off. |
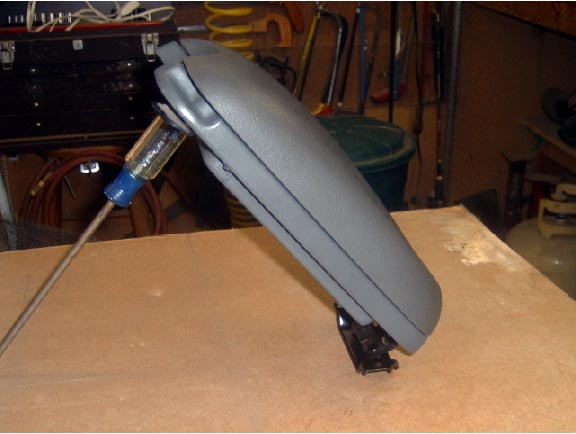
Step 2: Disassembling the armrest console.
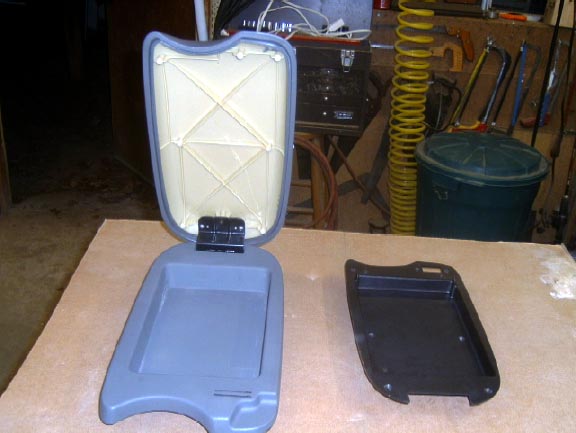 |
You will need to spilt the top portion
of the armrest assembly. This give you access to the hinge. |
Step 3: Remounting the hinge..
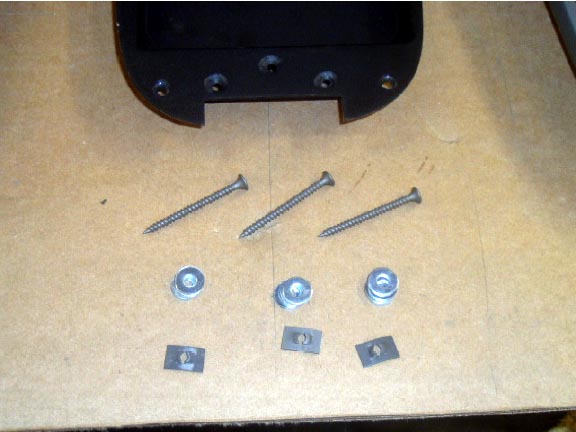 |
Remove the hinge from the top portion of
the armrest assembly. |
|
|
|
 |
Use 12 5/16 washers for spacers, 4 on each
screw. |
|
|
|
 |
Re-mount the metal for the catch, but putting the top section on using the original screws and speed clips. |
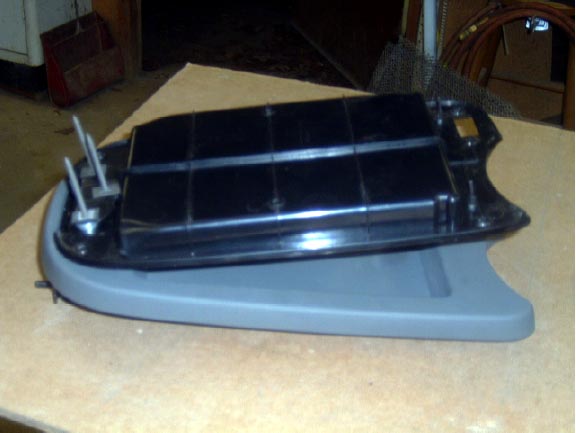
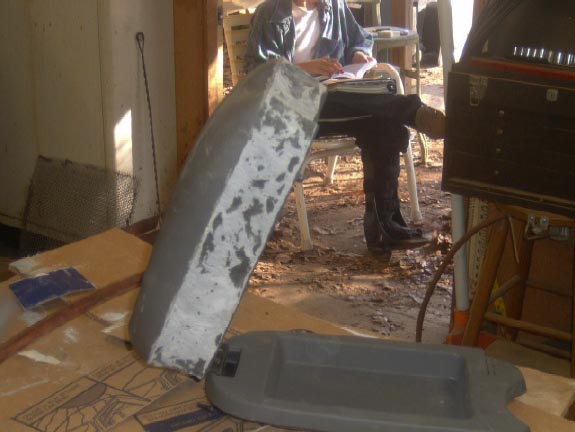
Step 4: Making the form..
 |
Decide on the amount of height you want
to raise the console. |
|
|
|
 |
To stiffen the assembly, you can use any old Styrofoam packing material. |
|
|
|
 |
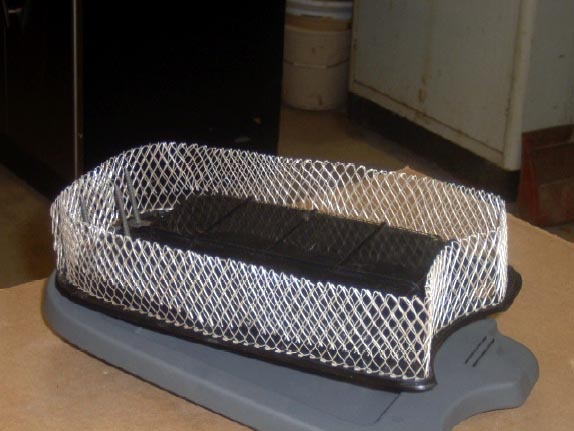
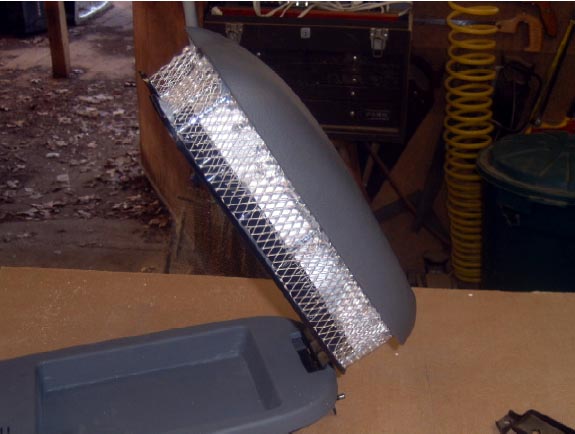
Mount the armrest top section by laying
the armrest top in place and use hot glue to hold it to the gutter screen. |
|
|
|
 |
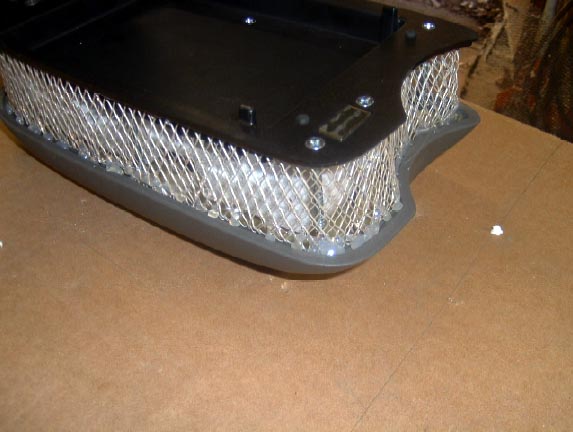
Screw the two pieces together. (Do not
over tighten). |
|
|
|
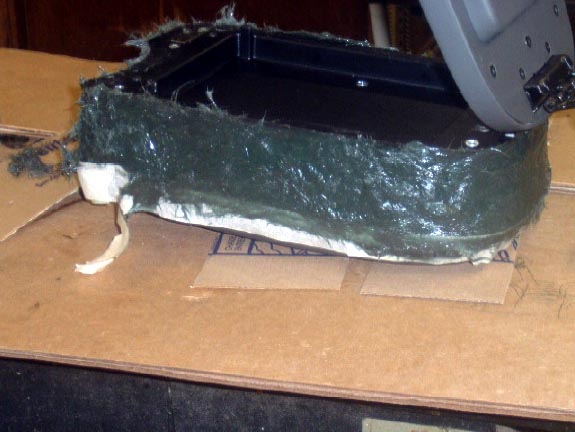 |
Now to apply the fiberglass. |
|
|
|
 |
Allow to dry and sand the high spots with about 80 grit sand paper. |
|
|
|
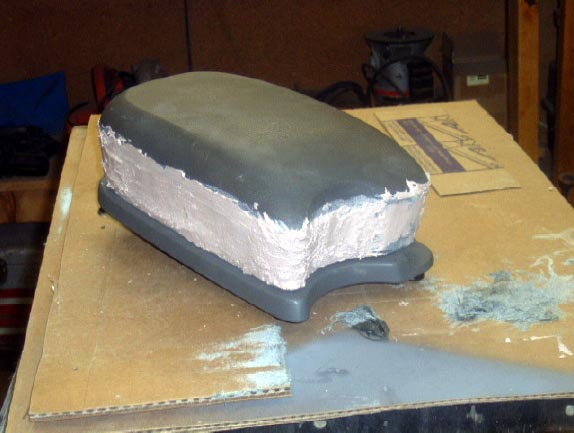 |
Next mix up some Bondo (no glass) and
hardener. |
|
|
|
 |
When dry, shape this form with 80 grit
sand paper. |
|
|
|
 |
Now, fill in all the small spots and holes that may be left with Liquid Metal. |
|
|
|
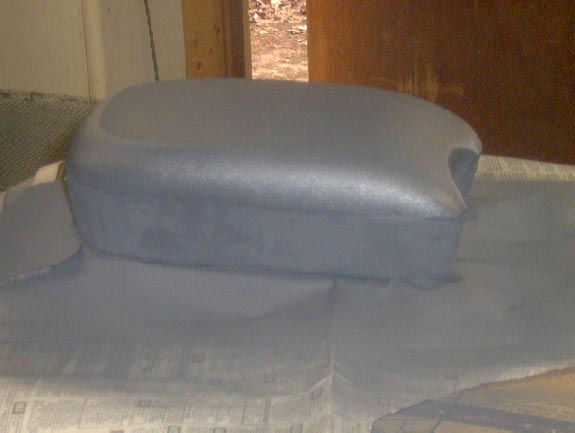 |
Sand with 200 grit sand paper to the
desired shape. Note: I sprayed the top as well. |
|
|
|
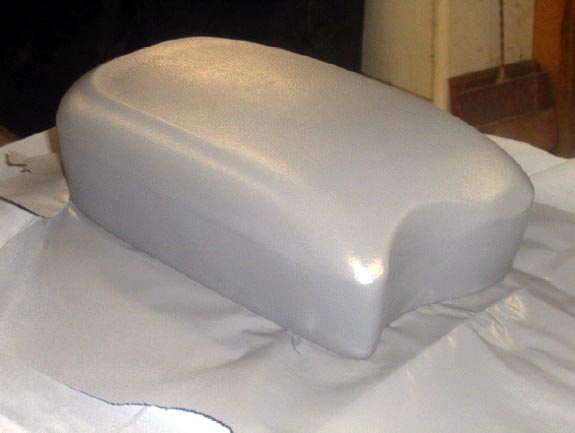 |
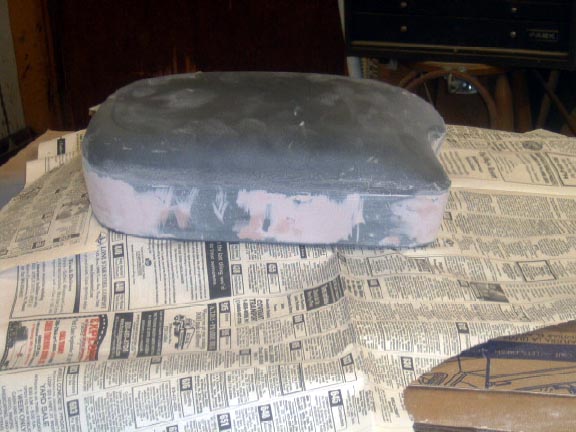
Sand with 200 grit sand paper and primer
it again. Optional: I sprayed 2 coats of clear acrylic. |
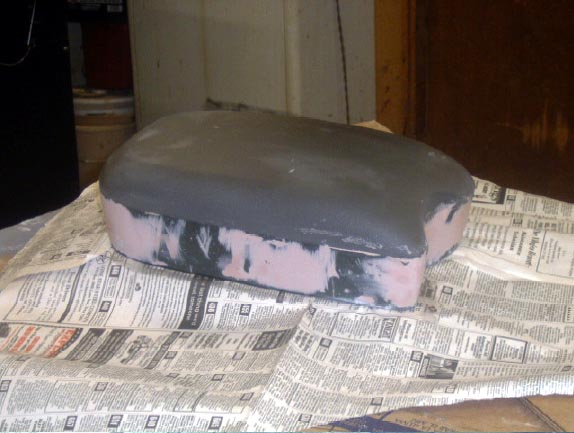
Step 5: Clean up..
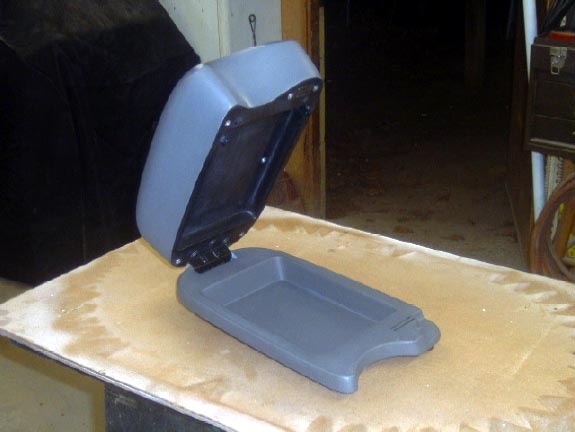 |
Clean the console. |
|
|
|
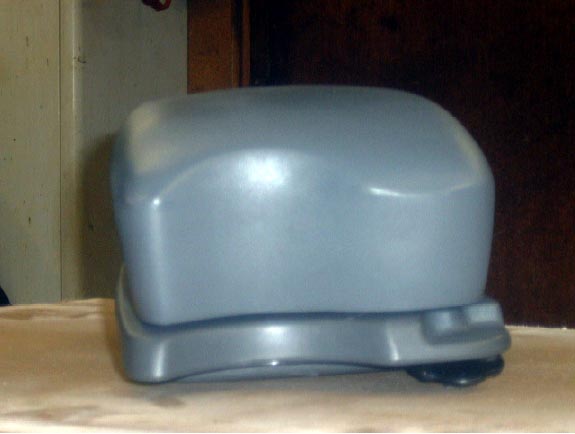 |
A different view of the finished console. |
Step 6: Re-install the console..
 |
Re-install the console and enjoy the more comfortable height. |
Additional information:
| Ted N.'s Armrest mod guide. |
A concise version of the above steps in a printable Adobe PDF file. You will need both Adobe Acrobat Reader to view the file and Winzip to extract the file. |
|
|
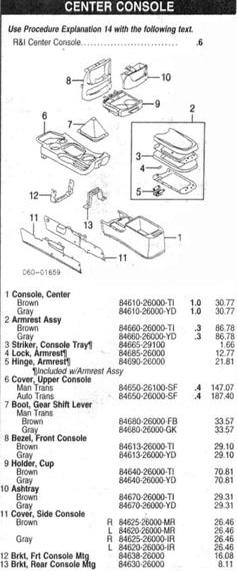 |
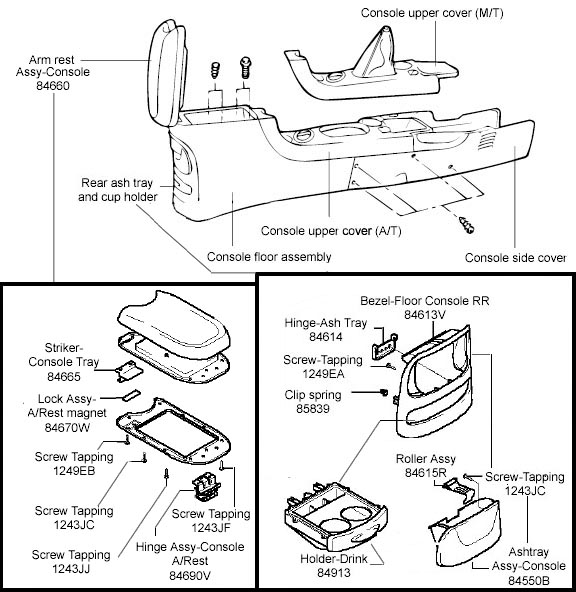
Console part numbers.
|
This site was last updated 03/02/06